Create a new contact | Hubspot Contacts API – Hubspot Form Submission endpoint
Hi there! Hope you are doing good. If you are here, you are looking for a way to create contacts in HubSpot. Good news! You are at the perfectly right place. In this article, I will help you set up the Hubspot Contact API, show you how to use the HubSpot form submission endpoint of Hubspot Contact API, and will walk you through using the Hubspot Contact API’s Form Submission endpoint to create a new contact with python and javascript using both API Key and Access Token.
When to use Hubspot Contact API’s Form Submission endpoint?
There are several scenarios where you need to use the form submission endpoint of HubSpot Contact API.
This endpoint is used to send form submission data to Hubspot Form. The best use of this endpoint is to send form submissions from non-Hubspot sources to any regular Hubspot form.
For example, say there are two domains, domain x, and domain y both owned by the same parent company. Now there is a redirect from domain x to domain y. Domain x is not registered with Hubspot. We need to trace the contact that came from domain x to domain y with its full original marketing details.
By marketing details, I mean all UTM parameters, original source details, referral details, and all other non-editable HubSpot fields of contact property. These fields you can’t control or edit while creating contact using Create Contact endpoint of Hubspot Contact API.
The form submission endpoint of the HubSpot Contact API can be implemented using python and javascript. I will demonstrate both here.
Before we start, things to keep in mind.
- A list of forms in your account can be found by navigating to Marketing > Lead Capture > Forms.
- This endpoint has a rate limit of 50 requests per 10 seconds.
This endpoint does not support reCAPTCHA. If reCAPTCHA has been enabled on the form, submissions will not be accepted.
So let’s get started!
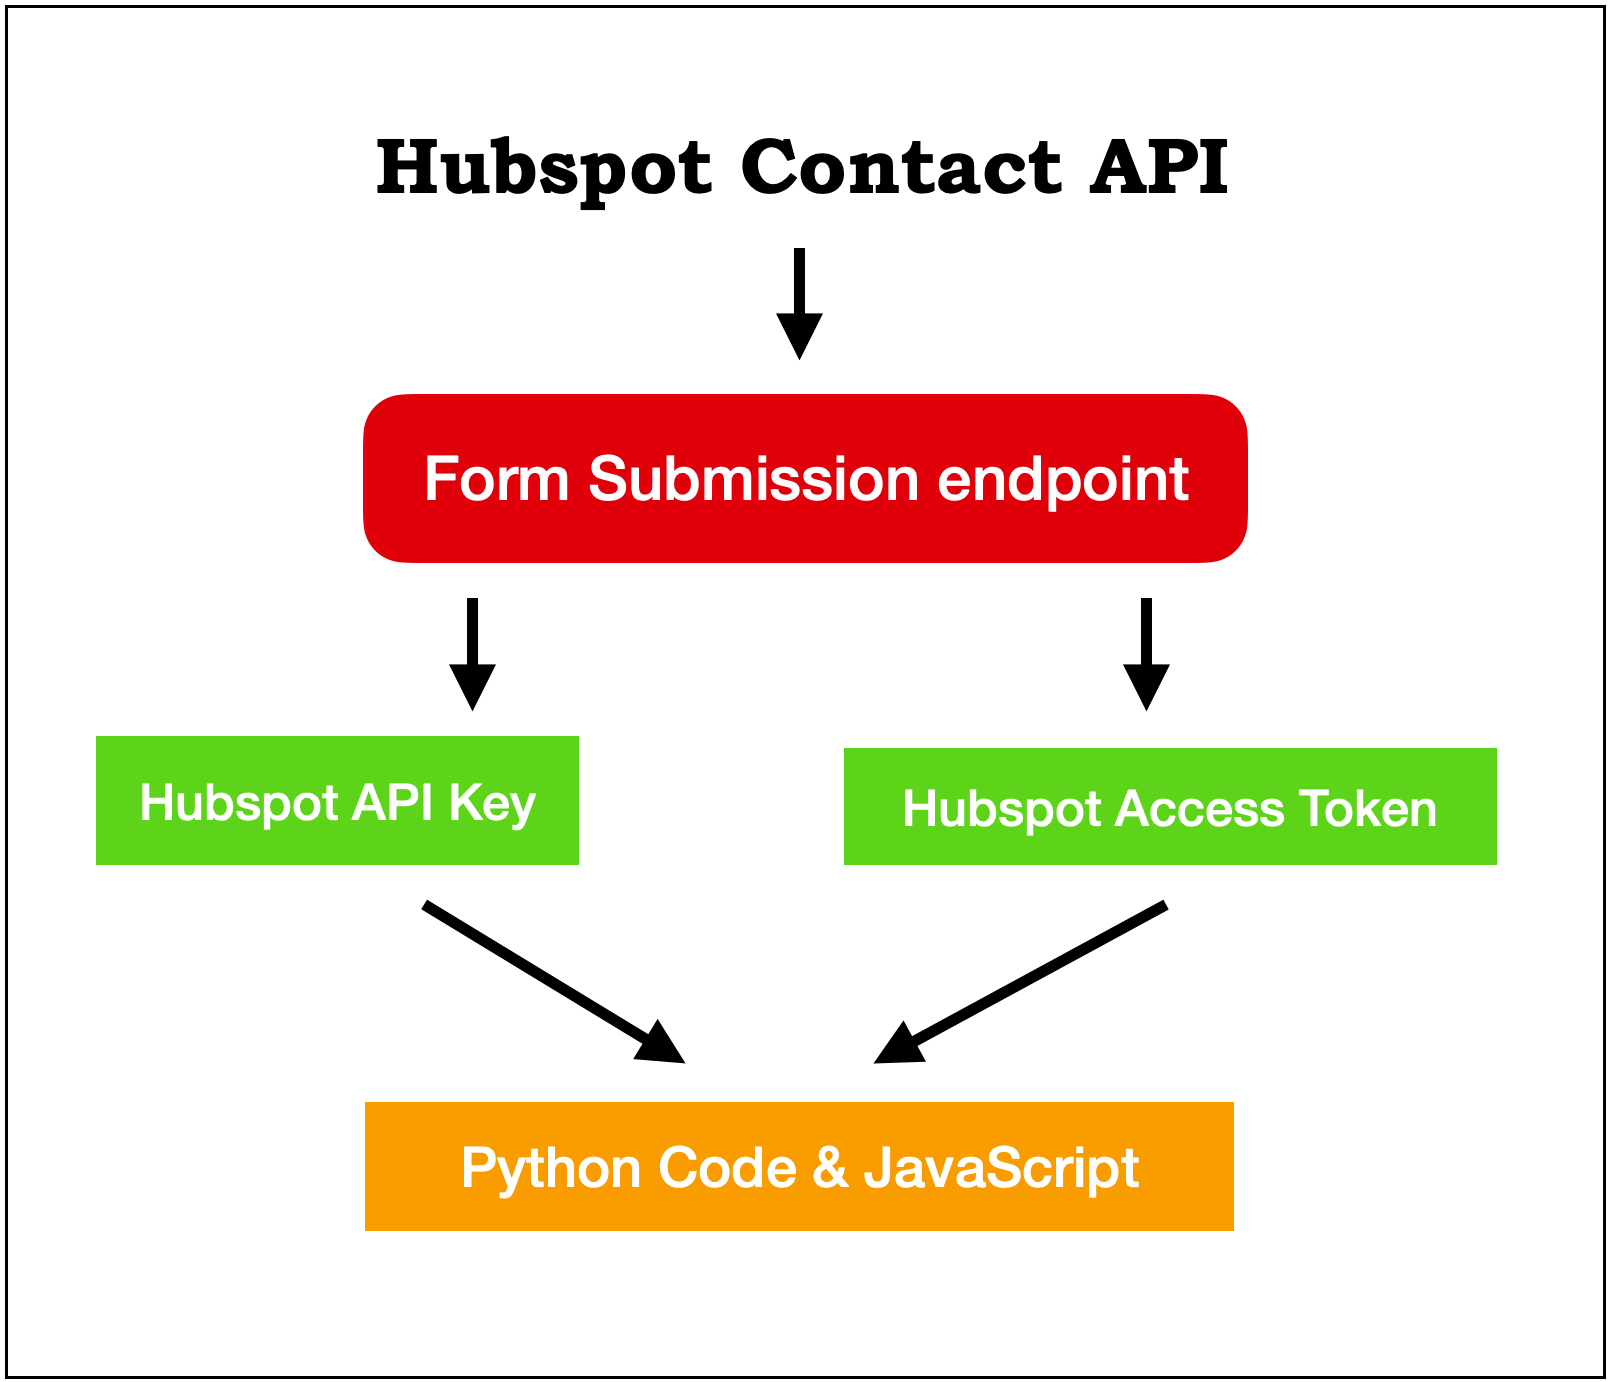
Before we see different ways of using the create the HubSpot Contact API’s Form Submission endpoint. We need to have some must-needed HubSpot credentials. In Hubspot, an API call can be made successfully in two ways. First, by using the HubSpot API key. Second, By making a HubSpot API call with an Access Token. In this article, I will be discussing both ways. You can choose whichever suits you the best.
NOTE:
Hubspot access token has a 30-minute expiry. That means you need to refresh the access token after 30 min. Get in touch with me to have an automated process of generating a new Access Token before the expiry date.
To get the HubSpot API or Hubspot Access Token you can see my guide on getting started with Hubspot API. In the getting started guide I have listed the step-by-step procedure of getting the Hubspot API and a way of generating the Hubspot Access Tokens.
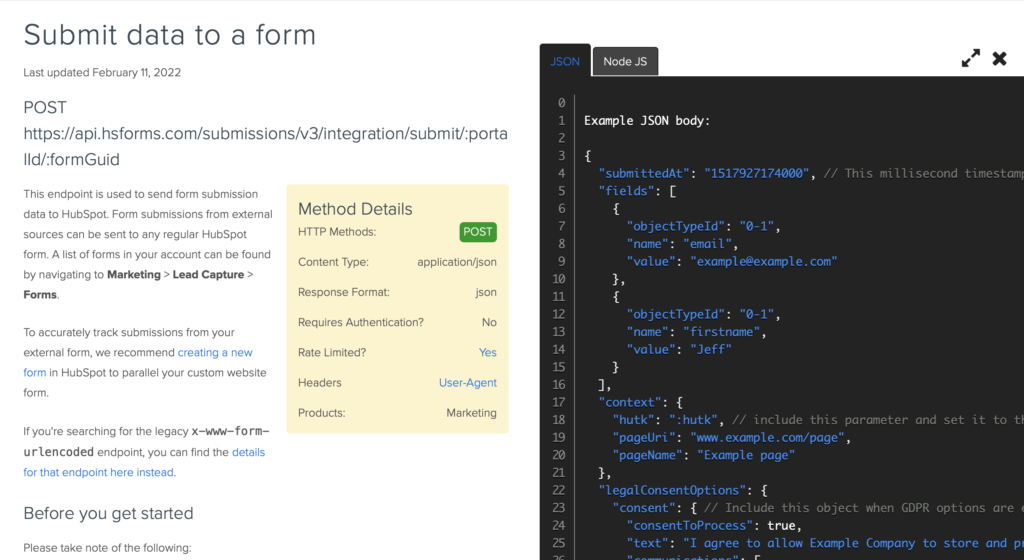
I believe by now you will have the Hubspot API Key or Hubspot Access Token. So let’s proceed with creating a contact or submitting data to the form using the Form Submission endpoint of the Hubspot contact API. More on the Form Submission endpoint can be found here.
Hubspot Contact API’s Form Submission endpoint example using API Key
First, create a function that uses the Hubspot Contact API’s Form Submission endpoint and a post-call. As you can see from the below code we are using the Hubspot API key and “https://api.hsforms.com/submissions/v3/integration/submit/{account id}/{form id}”.
#!/usr/local/bin/python3
# command to run this code $ python3 ./form-submit-api-key.py
import sys
import datetime
import json
import urllib
import requests

contact_dt = {
      "submittedAt": "1652279980835",
      "fields": [
        {
          "name": "firstname",
          "value": "JGFormSubmit2022-05-11_1"
        },
        {
          "name": "email",
          "value": "[email protected]"
        },
        {
          "name": "website",
          "value": "jgformsubmit2022-05-11_1example.com"
        },
        {
          "name": "message",
          "value": "Form Submit test by JG 2022-05-11_1"
        }
      ],
      "context": {
        #"hutk": ':hutk', // include this parameter and set it to the hubspotutk cookie value to enable cookie tracking on your submission
        "pageUri": "www.example2022-05-11_1.com/page",
        "pageName": "Example page 2022-05-11_1"
      },
      "legalConsentOptions": {
        "consent": {
          "consentToProcess": True,
          "text": "I agree to allow Example Company to store and process my personal data.",
          "communications": [
            {
              "value": True,
              "subscriptionTypeId": 999,
              "text": "I agree to receive marketing communications from Example Company."
            }
          ]
        }
      }
}

def form_submit_to_create_contact(apikey,hubspot_account_id,hubspot_form_id):
    try:
        url = "https://api.hsforms.com/submissions/v3/integration/submit/{}/{}?".format(hubspot_account_id,hubspot_form_id)

        parameter_dict = {"hapikey": apikey}
        headers = {"Content-Type": "application/json"}

        parameters = urllib.parse.urlencode(parameter_dict)
        get_url = url + parameters

        response = requests.post(url=get_url, json=contact_dt, headers=headers)
        return response
    except:
        print("\n *** Function (form_submit_to_create_contact) Failed *** ",sys.exc_info()())


if __name__ == '__main__':
    try:
        timestamp = datetime.datetime.strftime(datetime.datetime.now(),'%Y-%m-%d %H:%M')
        print("DATE : ",timestamp,"\n")
        print("Form Submission endpoint of Hubspot Contact API")

        hapikey = 'replace with Hubspot API Key'

        #to get hubspot account id, login to hubspot using your credential, select an account if you have multiple accounts,
        # in home url you will find the account id
        #demo = https://app.hubspot.com/reports-dashboard/36493494
        hubspot_account_id = "replace with your Hubspot account ID"

        # go to https://app.hubspot.com/forms/36493494
        # select the form that you want to submit using API
#https://app.hubspot.com/forms/36493494/2b87dhgwwej3-fdne4k-7680fe39e3e1/performance
        hubspot_form_id = "replace with form Id"
        status = form_submit_to_create_contact(hapikey,hubspot_account_id,hubspot_form_id)
        print("\n Form Submit status :\n",status)

        print("\nForm Submit processing Finished \n")
    except:
        print("\n *** Form Submit processing Failed *** ", sys.exc_info())
Hubspot Contact API’s Form Submission endpoint example using Access Token
NOTE: The code to use Hubspot Contact API’s Form Submission endpoint remains the same.
#!/usr/local/bin/python3
# command to run this code $ python3 ./form-submit-access-token.py
import sys
import datetime
import json
import requests

contact_dt = {
      "submittedAt": "1652279980835",
      "fields": [
        {
          "name": "firstname",
          "value": "JGFormSubmit2022-05-12_1"
        },
        {
          "name": "email",
          "value": "[email protected]"
        },
        {
          "name": "website",
          "value": "jgformsubmit2022-05-12_1example.com"
        },
        {
          "name": "message",
          "value": "Form Submit test by JG 2022-05-12_1"
        }
      ],
      "context": {
        # To know how to use hutk get in touch with me.
        #"hutk": ':hutk', // include this parameter and set it to the hubspotutk cookie value to enable cookie tracking on your submission
        "pageUri": "www.example2022-05-12_1.com/page",
        "pageName": "Example page 2022-05-12_1"
      },
      "legalConsentOptions": {
        "consent": {
          "consentToProcess": True,
          "text": "I agree to allow Example Company to store and process my personal data.",
          "communications": [
            {
              "value": True,
              "subscriptionTypeId": 999,
              "text": "I agree to receive marketing communications from Example Company."
            }
          ]
        }
      }
}

def form_submit_to_create_contact(access_token,hubspot_account_id,hubspot_form_id):
    try:

        url = "https://api.hsforms.com/submissions/v3/integration/submit/{}/{}?".format(hubspot_account_id,hubspot_form_id)

        headers = {"Content-Type": "application/json","Authorization": "Bearer "+access_token}

        response = requests.post(url=url, json=contact_dt, headers=headers)

        return response
    except:
        print("\n *** Function (form_submit_to_create_contact) Failed *** ",sys.exc_info()())


if __name__ == '__main__':
    try:
        timestamp = datetime.datetime.strftime(datetime.datetime.now(),'%Y-%m-%d %H:%M')
        print("DATE : ",timestamp,"\n")
        print("HubSpot Contact creation using Hubspot Contact Create API")

        access_token = 'replace with Access Token'

        #to get hubspot account id, login to HubSpot using your credentials, select an account if you have multiple accounts,
        # in home url you will find the account id
        #demo = https://app.hubspot.com/reports-dashboard/36493494
        hubspot_account_id = "replace with Hubspot account Id"

        # go to https://app.hubspot.com/forms/36493494
        # select the form https://app.hubspot.com/forms/36493494/2b87dhgwwej3-fdne4k-7680fe39e3e1/performance
        hubspot_form_id = "replace with form Id"
        status = form_submit_to_create_contact(access_token,hubspot_account_id,hubspot_form_id)
        print("\n Form Submit status :\n",status)

        contact_detail = json.loads(status.text)
        print(contact_detail)

        print("\nForm Submit processing Finished \n")
    except:
        print("\n *** Form Submit processing Failed *** ", sys.exc_info())
Hubspot Contact API’s Form Submission endpoint JavaScript example
The code to submit the Hubspot form using the Hubspot form submit endpoint remains almost the same. The only thing that changes us is the syntax to post the payload to this endpoint.
Below is the code that you use to submit a HubSpot form. You can customize the below code to generate the contact payload dynamically.
<script>
$(document).ready(function () {
	//you can call form_submit() function based on some condition
    var st = form_submit()

    function postData(payload, url) {
        var token = $('input[name="csrfmiddlewaretoken"]').attr('value')

        return $.ajax({
            headers: { "X-CSRFToken": token },
            type: "POST",
            dataType: "json",
            url: url,
            data: JSON.stringify(payload),
            contentType: "application/json; charset=utf-8",
            beforeSend: function () {
            },
            complete: function () {

            },
            success: function() {
            },
            error: function (xhr, status, error) {
                var errorMessage = xhr.status + ': ' + xhr.statusText
                console.log('Error - ' + errorMessage);
                $('#loadingDiv').hide();
                $('.loadingDiv').hide();
            }
        });
    }

    function form_submit(){
            payLoad = {
                "submittedAt": "1652279980835",
                "fields": [
                    {
                    "name": "firstname",
                    "value": "JGFormSubmit2022-05-12_1"
                    },
                    {
                    "name": "email",
                    "value": "[email protected]"
                    },
                    {
                    "name": "website",
                    "value": "jgformsubmit2022-05-12_1example.com"
                    },
                    {
                    "name": "message",
                    "value": "Form Submit test by JG 2022-05-12_1"
                    }
                ],
                "context": {
                    // To know how to use hutk get in touch with me.
                    //"hutk": ':hutk', // include this parameter and set it to the hubspotutk cookie value to enable cookie tracking on your submission
                    "pageUri": "www.example2022-05-12_1.com/page",
                    "pageName": "Example page 2022-05-12_1"
                },
                "legalConsentOptions": {
                    "consent": {
                    "consentToProcess": True,
                    "text": "I agree to allow Example Company to store and process my personal data.",
                    "communications": [
                        {
                        "value": True,
                        "subscriptionTypeId": 999,
                        "text": "I agree to receive marketing communications from Example Company."
                        }
                    ]
                    }
                }
            }

            url = "https://api.hsforms.com/submissions/v3/integration/submit/replace with Hubspot account Id/replace with form Id"
            var response = postData(payLoad,url);
            response.then(function(data){
                var status = data.code
                return status
            });
            return response
        };
});
</script>
In the Create Contact endpoint of Hubspot Contact API after successful contact creation apart from status 200, we get the contact id (i.e vid) of the newly created contact. In the Form Submission endpoint of the Hubspot contact API, if the submission is successful we get status 200 along with a message (in HTML format) based on what the form returns.
Form Submission endpoint Response details
So the return message of the Form Submit endpoint will include the following fields:
- redirectUri – If the submission was accepted, and the form has a redirect URI set in its settings, this will be that redirect URI.
- inlineMessage – If the submission was accepted, and the form has an inline thank you message set in its settings, this will be the HTML for that message.
- Errors – A list of errors with the submission data. Each entry will contain a message value detailing the specific error, and a coded error type. You can find a list of errorTypeoptions below.
Hope I was able to solve the problem. If you like this article and think it was easy to understand do share it with your friends and connection. Thank you! see you soon.
If you have any questions or comments feel free to reach me at.
Checkout out my other API Integration and Coding Solution Guide